Hey, all. I’ve gotten a decent response on my Mahindra Roxor series, the Indian WW2 Jeep clone. Therefore, I decided to show a few more things that I’ve done since my last post.
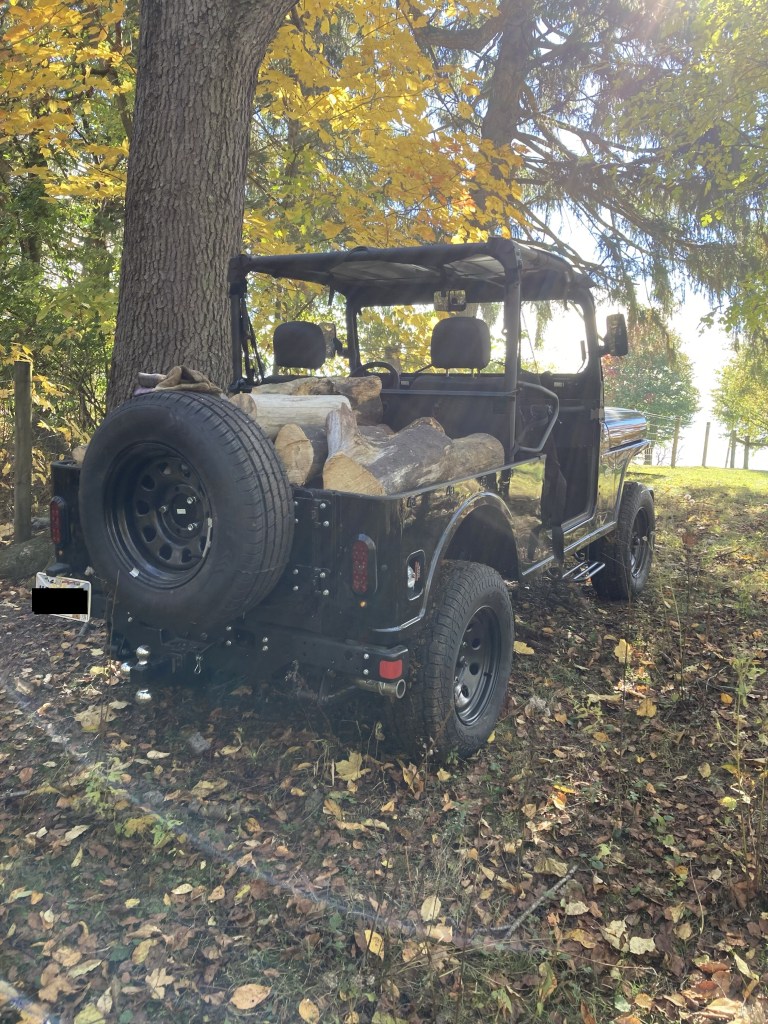
The first thing I’d like to discuss was my battle to make this thing street-legal- it took some doing. As you can see in the pic above, the Roxor now has legit plates. There’s a caveat, of course. They are utility plates, and the Roxor can’t be operated on divided highways. This is fine because it won’t exceed 55 MPH if you drive it off a cliff. But it can now be operated on rural roads.
To get it street-legal, I had to get a title made, ensure it met all of the state’s requirements for a streetable vehicle, and then, last but not least, it needed a written inspection by local law enforcement using the Ohio DPS Form 1373. After I did all the hoop-jumping, it was easy. I showed up at the DMV, handed over the paperwork, and paid my fee. Received the plate, went home, and installed it.
The hardest part was figuring out the process. But now it’s done.
Something else I wanted to discuss was my work on the front bumper. Guys, if you decide you want to buy a Roxor, IMO there is no need for an HD front bumper. The stock unit is good stamped steel, it just needs a couple of mods. The first thing I addressed was the addition of a tow strap. See below.
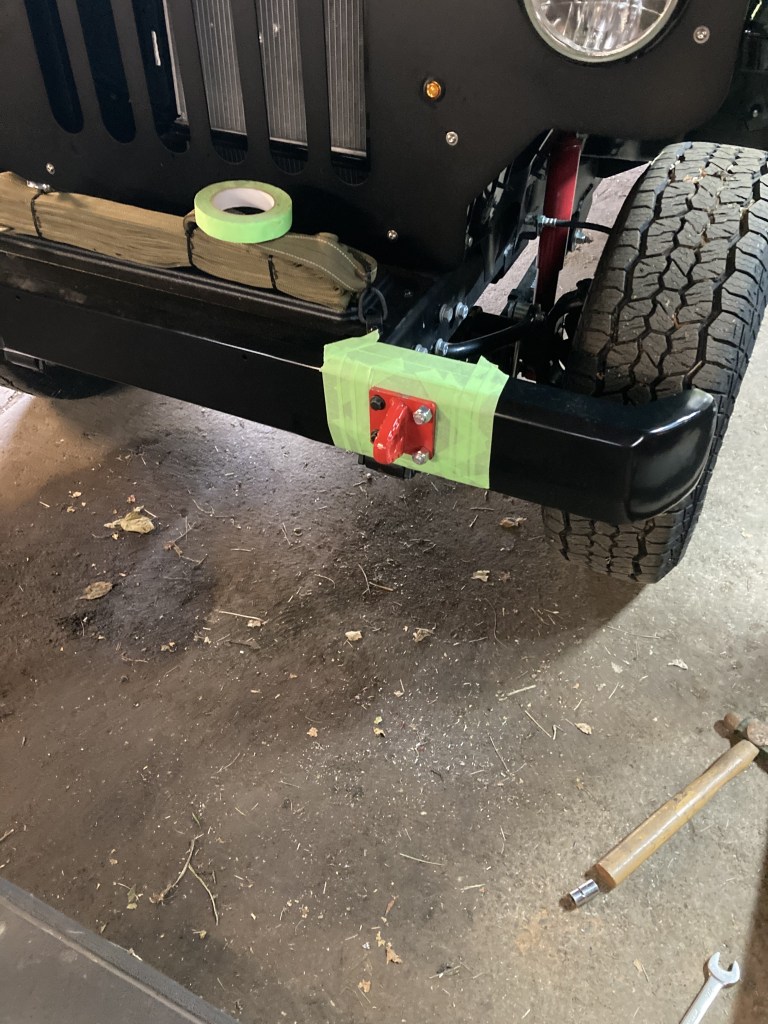
You can see the shackle work in progress in this pic, but I’d like you to look at how the tow strap is installed. I used two Harbor Freight 2.99 tie-downs (I’ve used many, many of these in this project. They are SO DAMN HANDY.) One on each end, secured to the existing beauty plate mount bolt, and a new hole drilled in the plastic plate. Now, lots of people would discard the stock plastic plate for a fancy steel electric winch mount, but I didn’t. I use an old-fashioned come-along to do the same job. Cheaper and dependable. Of course, to use the come-along, you need good shackles, but I’ll discuss that later.
It’s nice to have a solid home for a tow strap, and you can see how I did it. I secured the tow strap to the tie-downs on both ends and made it neat with disposable zip-ties, just like we did in the service. Instantly accessible when you need it. The tow strap is a surplus French Army unit, but Harbor Freight has a good one, too.
Then, it was time to tackle the install of the tow shackle. Of course, you could probably buy these from Mahindra, but I did my own thing. This was much cheaper, but it came with several installation headaches. First, the inexpensive (but beefy as hell) shackles had the wrong hole spacing for the existing Mahindra bumper bolts, which I planned to use. Also, by using the stock bumper, there were clearance issues with the two outer bolts of the shackles. So, I had to get creative.
I ended up milling the shackle mount holes to fit the stock 2 1/2 inch bumper bolts. The shackle holes were 3 inch. This was fine for the frame-mounted bumper bolts, but what could I do for the outer holes? I wasn’t satisfied with just running the bolts through the bumper, even though the kit had a stout backing plate. Well, I looked at the hardcore steel pipe that Mahindra ran between the front frame horns (a definite improvement from the original Willys design), and I had an idea.
I needed big ass U-bolts. See below.

This. This would do the trick! Finding the proper U-bolt took a lot of looking, but I managed. Now, all four holes of each shackle had a ton of support. I was confident that I could use the shackles to pull my vehicle out of a hole and suspend the Roxor in the air using the mounts. This wouldn’t be necessary, ever, but you get my drift.
It’s always better to over-build. See below.

In the pic above, you can see that the two inner holes were modded to the stock 2 1/2 inch spacing, and the outer holes remained at 3 inch, which was OK for the U-bolts. Pretty beefy. More than adequate for the task- the inner holes are secured to the stock bumper/frame interface, and the outer holes are pulled in tight via the massive U-bolt secured to the reinforcing frame pipe. I was happy, even though it took some doing. See below for completed look.

Now, some more mods had to be addressed. It gets cold around here, and I didn’t want to be totally hardcore in this Army Jeep. I need some creature comforts and, eventually, an enclosed cab. Am I willing to pay thousands for said comforts? Hell, no!
Of course, I hit Amazon up in a search for what I needed. The cab enclosure is a mod I haven’t started on, but I have the materials for it. I’ll construct the enclosure from marine vinyl and military-style click straps. But as of right now, I’m not there yet. However, I have installed the heater system.
Guys, this took a lot of thought. When thinking about the heater, I considered a traditional water-fed automotive heater at first. This is a huge pain in the butt, and it’s also expensive. Of course, it would be awesome. But I don’t need awesome, just adequate. Basic defrosting and enough heat to keep the cab above zero when enclosed. That’s it.
I settled on an electric unit, once again, an Amazon find. Note: do NOT get paint on the blower fan and motor. Don’t ask me how I learned this lesson. Scratch one heater in the first attempt.
I secured everything I needed via Amazon. Two rolls of 12GA primary wire, one red, one black. A switch, I needed it to remind me that it was on, so I chose a lighted unit. It ended up working great. Strangely enough, one of my struggles was finding a good defrost vent- you’ll laugh, but the best fit for the job was a repurposed shop-vac gulper nozzle. You’ll see, I promise.
The little heater came with hoses, and I modded its wiring to fit my needs. The stupid switch it came with, while adequate, wasn’t the “stock” look I was after. I wanted the lighted toggle switch mounted to the block-off plate in the dash. See image below for how it all looked installed after a real struggle.
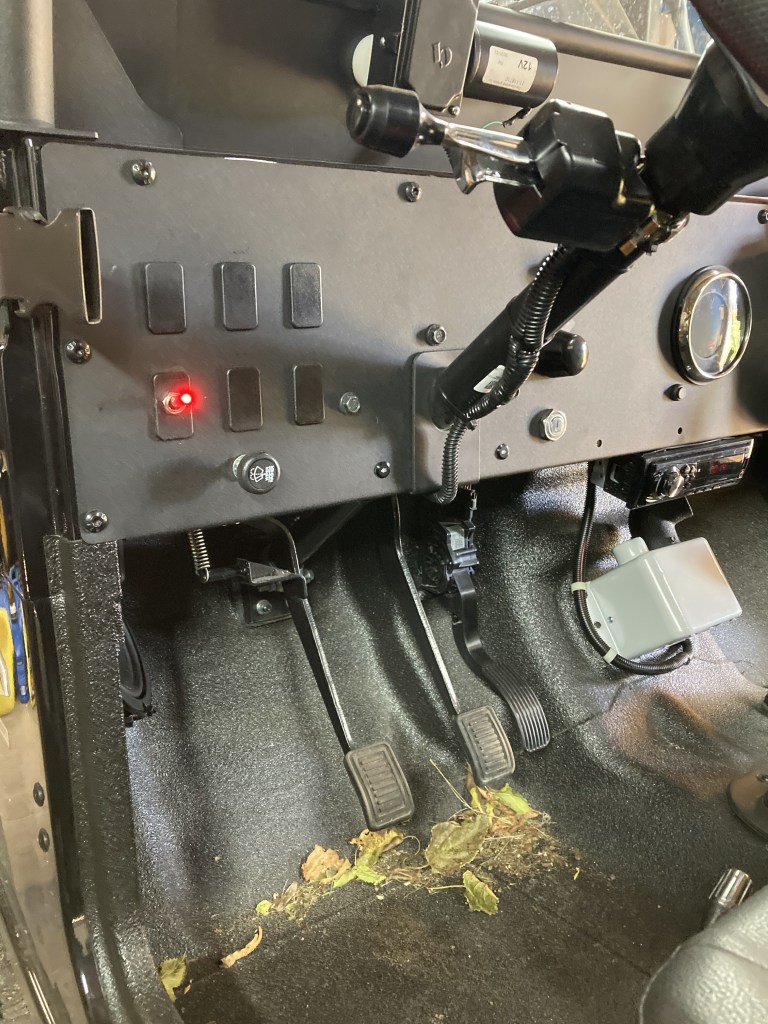
In the image above, you can see the heater switch, and the heater itself, which I left unpainted. Curiously, the toughest part of the job was removing the stupid block off plate and installing the darn switch! A real hassle, but I got it done, and it looks like it was meant to be there- as I intended. The heater itself was very simple to install. There is a rectangular raised area on the floor which just so happened to be the exact right size and shape for the heater. Of course, before I installed the heater, I made sure to look underneath to ensure that no screws or drill bits would hit something I didn’t want screwed or drilled. It was OK, lots of clearance. So, I simply used self-tapping screws and within five minutes the heater was installed.
It took a lot longer to route the wires and ensure everything was hunky-dory within the little supplemental fuse box I installed for my mods. But I got it done.
Then, I needed to route the defrost hose. This took some thought. There was a block-off plate in the center of the top of the dash, I suspected it was screwed into place. I looked under the dash- no, the plate appeared to be glued somehow, but yes, there was an existing hole for a defrost duct. I just needed to remove the block-off plate. I hatched a plan.

Using a putty knife and some care, the aluminum block-off plate peeled up, revealing the existing duct hole. The oblong hole was slightly narrower than the heater hose that came in the heater kit, but I reasoned that that was good. Squish the hose a bit, and it would hold itself in the hole, right? Well, that’s how things worked out eventually, but I needed to mod the plate.
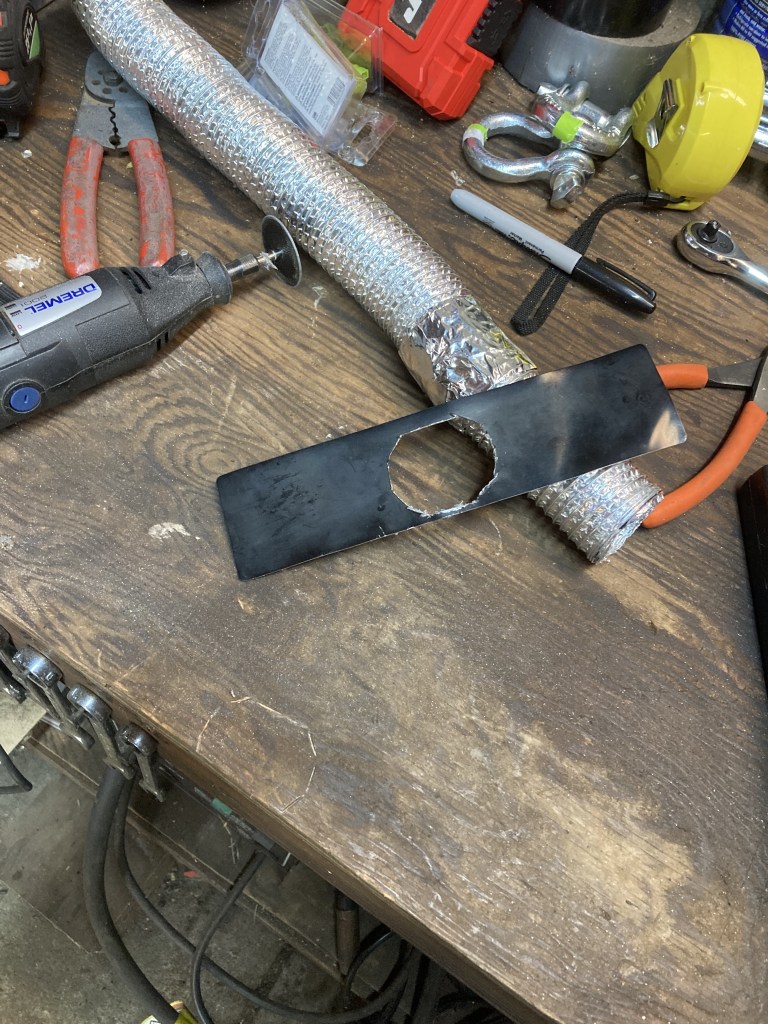
This is why the Dremel tool is one of the essential items in a jack-mechanic’s tool bag. Of course, it is also one of the most dangerous tools, as well. You can really screw stuff up with a Dremel if you aren’t careful. But, as you can see, the cut-off wheel did a pretty OK job at making the hole I needed.
So, I popped the hose under the dash and maneuvered it around the speedo. I grabbed it from the top, squished it to fit through the hole, and ensured I had enough protruding for the hose clamp, which secured the heater hose to the sweeper nozzle, my new defrost duct. As I tightened the hose clamp, of course the heater hose ripped. Of course.
But… I had HVAC tape on hand, an indispensable homeowner’s quick-fix. Make sure you get the 3M variety. I reinforced the heater hose with the tape, and all was well. I also used the HVAC tape to stick the block-off plate back on the dash, then to be sure, I ran self-tapping screws into both ends. When I was satisfied with the install, I prettied everything up with flat-black Rustoleum. I swear by Rustoleum, I wouldn’t use anything else.
Behold, the final look of the complete install.
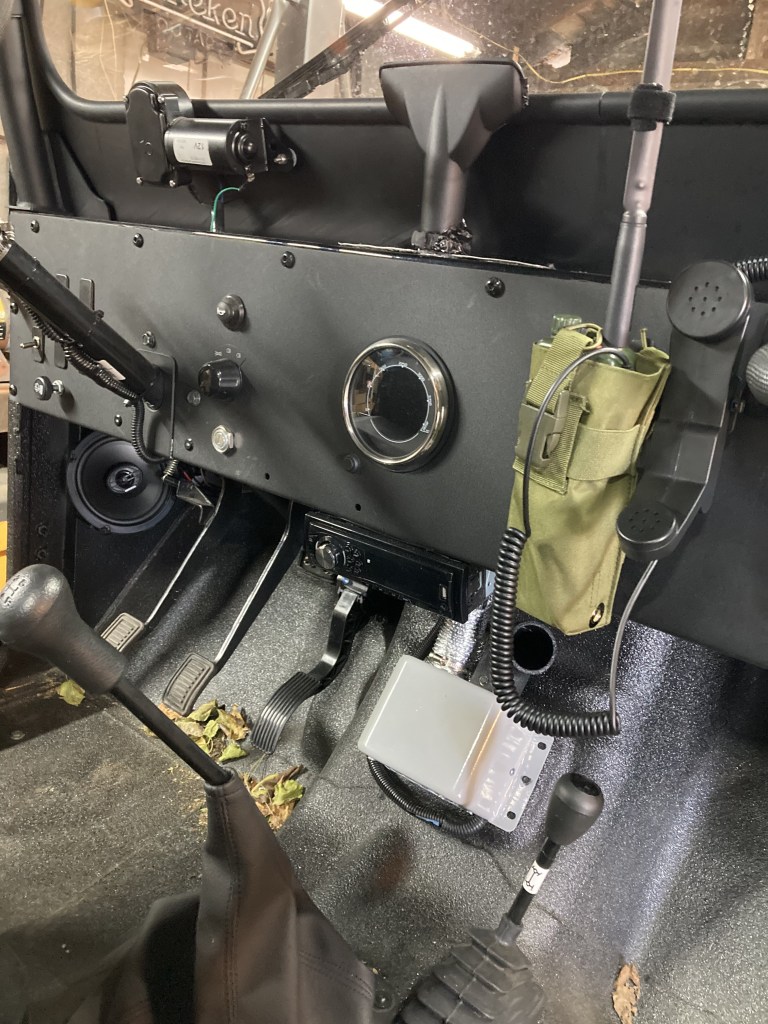
Note how one port of the heater goes to the defrost duct, and the other is simply vented into the passenger compartment with a 90 degree piece of PVC pipe, which I painted. I believe in simplicity.
One last thing- in the pic above, you can also see a curious military-style radio hanging on the dash. This was a conceit of mine. For my own amusement, I bought a radio that looks an awful lot like the Harris radios I used overseas, complete with a SINCGARS-style handset. The radio is fully functional, but it’s not a Harris. It’s a Baofeng AR-152, an amazingly affordable and capable civilian ham radio. An even cheaper, but still very capable, version is the Baofeng UV-5R. It was a revelation to me that ham radios were so inexpensive these days- I thought you had to spend hundreds of dollars for a good unit. Nope, not so much. I had to do this- to get the neat dash install, I had to buy a dash bracket and purchase the radio itself. I modded the radio pocket with a grommet to power the radio via the vehicle 12V port when necessary- the grommet provides access to the charging port.
So… my WW2 Jeep clone, the Roxor, has military-style communication capabilities, as well. Laughs, I need to find the time to learn how to actually use the radio, though!
But here you go. All the mods I’ve been pecking away at. When I get the cab install done, I’ll show you guys.
Peace, J.
