2024 Ford Maverick Hybrid, review

OK, so if my old 2022 gas-burner, AWD Maverick was so awesome, then why did I trade it in and get this hybrid?

Pretty simple. I ordered this Mav about a year ago for one of my kids, and then there were some changing life circumstances and they didn’t need it. So, not wanting to lose my non-refundable deposit, I stepped back and gave the problem some thought.

One, I racked up some serious miles on my 22 over the two years that I owned it. When I traded it in, there was about 55k on the clock. This was due to a lot of commuting to my kid’s university, about 140 miles from here, one way. Therefore, the relatively high mileage was a consideration.

Two. While I loved the AWD on the old Mav, and the 4k tow package with HD transmission was awesome, I rarely needed those capabilities.

Finally, this new truck came factory equipped with a hard, tri-fold tonneau bed cover. For many reasons, this is more useful on a day-to-day basis than an open bed. Also, the hybrid Mavs have gained a well-deserved reputation for excellent mileage in the short time they’ve been on the market.

It was a 99 to 1 percent calculation. I paid a lot for the 1 percent considerations, i.e. AWD and 4k tow, and I could gain on the 99 percent end of things; daily mileage and tonneau cover.

Therefore, I decided to trade my 22 Mav for the 24. After a month of operation, it was a good decision. The 22 was an amazing work truck, and a superlative daily driver, but the hybrid Mav is a better fit on balance. As much as I loved my 2022, that really says something.

All of what I said in my earlier reviews of the 2022 Maverick stands- I won’t revisit those features. You can find them in my earlier posts. Just type in “Maverick” on this site’s searchbar. The Ford Maverick is head and shoulders the best small utility truck on the market. Period. After two years of operation on my 22 model, it was a great value and a no-kidding worker. I routinely hauled 24 bales of hay, heaping truckloads of firewood, and construction materials. This new vehicle will do the exact same type of things within its design specifications, which are identical to my EcoBoost truck, minus the optional AWD and 4k tow package.

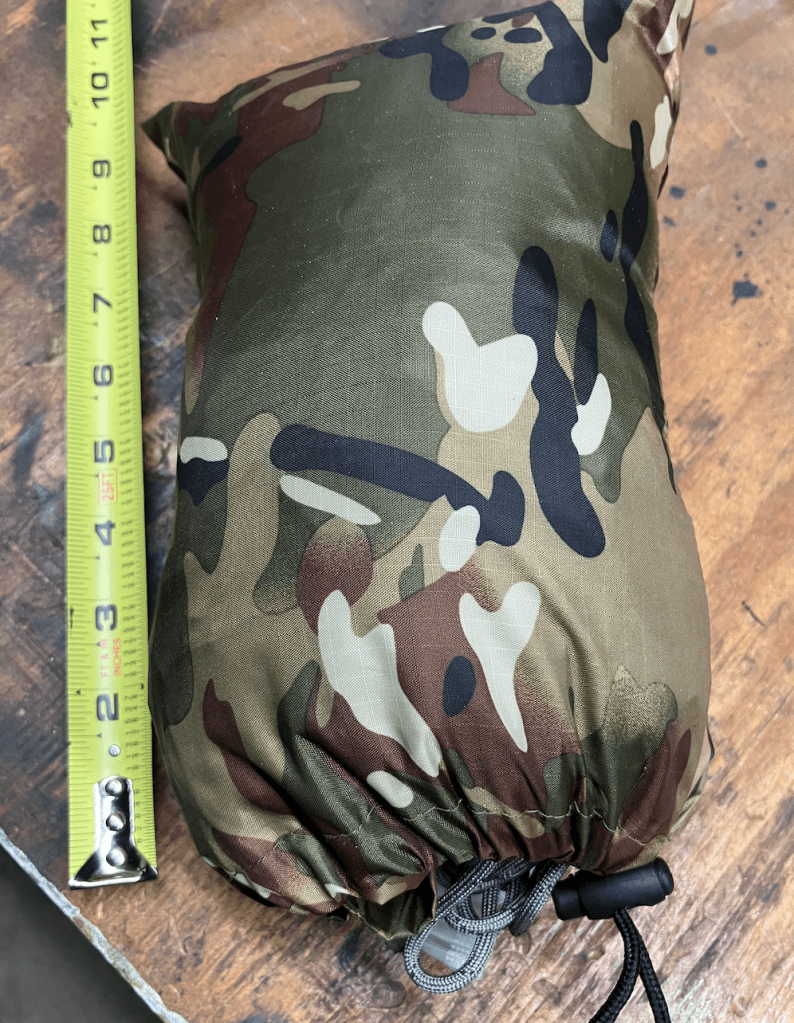
Therefore, I’ll talk about the new truck’s features that differ from the old truck. First, let me talk about the Ford tri-fold hard tonneau, which was worth every penny. See below.

This tonneau cover is awesome! It keeps stuff dry as you cruise around- for me, this is mostly bags of animal feed. In the past, I always had to take weather into account when hauling feed. It’s not a good idea to let your feed get wet. In addition, the tonneau doesn’t crimp your style when you need it out of the way. It easily and securely folds up; there are military-style clips and a strut that hold it in place when it is raised. Observe.

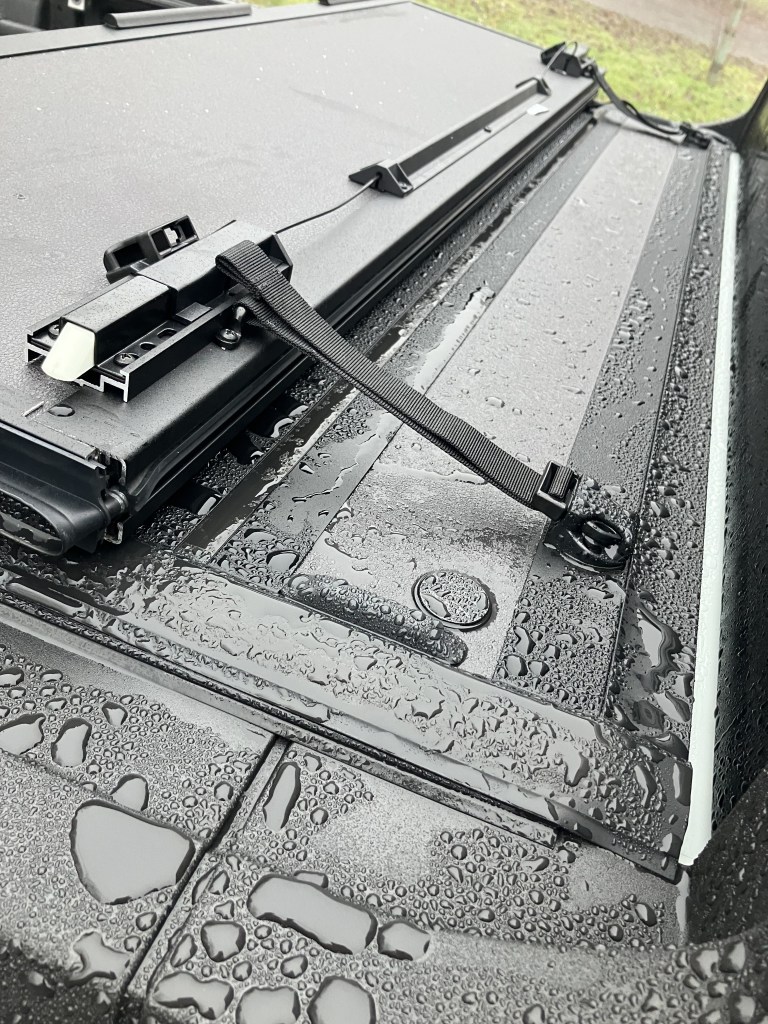
This is very handy. It’s 30 seconds work to enjoy the advantages of an open bed, and it’s the vehicle’s lifetime to use the advantages of a covered bed. Worth every cent, IMO. Here is a pic of standard use around here.

Note that once again I opted for the factory bed extender. This gives me seven feet of useable bed space, and I use this all of the time. I purchased the base XL trim because I’m a fan of steelies on a work truck. This is not a minor feature for me, steel wheels hold up better under field conditions. I made sure that I ordered the floor D-ring cargo hooks and bed cubbies; these are not standard features on XL models. However, they are must-haves for this guy. Also, as the Maverick base is the standard from which the higher trims are built, the base model is easily adapted for these higher trim features. When the shop at Team Ford added the rings and cubbies, I think it took them less than an hour of labor.

It was worth every darn cent! Also, the crew at Team Ford, both sales and service, are top notch. I got a fair deal on the trade in, the process was smooth, and the past two years of service have been a great experience. These people take care of their customers. That can be hard to find.

But I digress. We’re talking about the differences between the two vehicles, the 2022 and the 2024. Let’s discuss the big kahuna; the hybrid drive.

HOLY CRAP. This is astonishing!

It is a real thing, cruising around in all-electric mode; this costs you NOTHING to drive! Right now, on crappy winter-mix gas (which gives you lower mileage), my overall mileage average is 42.3 mpg. Wow. This is a full ten mpg better than my 2022, which had phenomenal gas mileage compared to a sedan, let alone a small truck! The Ford Maverick is the king of thrifty vehicles on the US market, no one else comes close in this vehicle class. Yes, you can point to all-electric vehicles or hybrid SEDANS like the Prius, but that’s an apples to oranges comparison. If you look at small trucks, the Maverick reigns supreme and compares favorably to small passenger sedans.

Also, in the 2024 model, the Maverick comes standard with cruise. The 2022 did not, and I had to go to great lengths to have factory cruise installed. When installed, factory worked great on the 22. However, it works better on the hybrid, which is astonishing. This is, IMO, an outgrowth of how the hybrid operates. While going downhill, the hybrid is an electric vehicle. If you have the cruise set, the recharging electric motor keeps you nailed to your set speed. This is unlike my old EcoBoost, which operates like the standard, non-adaptive cruises of the past; i.e. they’d creep up while you went downhill, and if you didn’t want to exceed your set speed, you’d have to tap the brakes, then reset the cruise. It’s a minor inconvenience, but the hybrid eliminated it. Very nice, and a completely unexpected feature.

For my lifestyle, I need a small, hard-working truck. Period. The Maverick does nearly the same work as a full-size, half-ton truck. The 1500 pound rated haul capacity is the same as a Chevy Silverado, with profoundly better mileage and overall utility and drivability. I know- I’ve owned and operated standard 1/2 ton trucks my entire life, and after two years of the Maverick, I don’t miss them.

The area where a full-size, 1/2 ton truck wins handily, of course, is towing capacity. The standard hybrid Mav is rated at 2000 pounds if you opt for the factory hitch. At one hundred lousy bucks, I did. IMO you are foolish not to pay for the factory hitch, even if you think you won’t need it. It’s better to have a capability and not need it than the other way around. At 100USD, it’s a no-brainer when you order your vehicle.

That 2k tow capability will solve most chores for most people. A good example is the standard Harbor Freight trailer, which is rated at 1750 pounds. See photo below, which is the HF trailer at work with a log splitter behind it on the job site. While this photo was not taken with the Maverick attached to the trailer (this is the Roxor at work), the base hybrid Maverick will 100% tow both this HF trailer and the log splitter that you can see behind it. You can really work this truck if you choose to do so. Well, I bought the Mav to work. As an aside, the HF trailer will easily fit a four-wheeler or lawnmower, and the standard Mav tow capacity will pull either one of those with ease. The Harbor Freight trailer seems custom made for the Mav in many respects. If you buy a Maverick, I’d recommend picking up this trailer, too.

The base hybrid Maverick is a real work truck. Period. I don’t care what some internet experts have to say; they are wrong.

In addition, it is a great, dead reliable grocery getter and people hauler. My earlier reviews stand, and the stakes were raised by the 2024 Hybrid Maverick.

This. This is a vehicle to purchase. Hands down. If you can’t find one, it’s well worth the (long) wait to custom order one.

Five stars. Highly recommended.

Cheap, but pretty awesome, multitool

Today is another gear day. This is because Walmart changed their style of inexpensive multitool; I was dissatisfied with their latest twelve-dollar offer. They used to sell pretty good, serviceable multitools for four dollars less. No more.

I try to seed all our vehicles and likely places of use with inexpensive multitools. Nothing is so darn frustrating than doing something somewhere, and you need just one stupid tool. Something like a Phillips screwdriver or maybe a pair of pliers.

I’m a big believer in keeping tools around in multiples. For example, I must have twenty 9/16 combination wrenches in my garage. This is born of experience; on many occasions, I’ve been on the job, and I couldn’t find a wrench, or the wrench was in an inconvenient location, or I needed multiples of the same size wrench. You get it. After near half-a-century of life, I’ve had enough of that type of crap.

Therefore, I was searching for a new type of inexpensive multi-tool. I needed four or five of them to achieve saturation.

Many look down on inexpensive tools with some degree of justification. It’s true. Some are total junk. I don’t buy junk. I may try one of them; but if it fails, never again. If a cheap tool works well, I’ll buy it again. A good example is the Harbor Freight Pittsburgh line of ratcheting wrenches; for the money, they cannot be beat. They are strong, they don’t slip, and the price is right. This is one example of many.

So, when I found this handy-looking little multi-tool on Amazon US, I decided to try one. I ordered exactly one. I’ll blow thirteen dollars to try something out, but I won’t invest much money in garbage.

The website description looked promising, and I liked that this multi-tool was essentially in pocket-knife format. Unlike many multitools, it wasn’t the usual fold-out, butterfly knife configuration, and it had a locking blade. What I didn’t like was that it had no pocket clip, a definite preferred feature. With the dumb-gadget-looking strip of apex bits, it looked like using the adequate provided sheath was required.

I shrugged, thought, “Hey, thirteen bucks,” and decided to try it. A few days later, here’s what I saw when I opened the box. Also, here’s what I’ve experienced after using it for small chores over the past week.

First, let’s establish immediately that this is NOT a hardcore, beat-the-shit-out-of-it titanium hell beast meant for the end of the world. It is a thirteen-dollar multitool, probably made in the millions somewhere in the Chinese Gulag archipelago. You have to take this into account. To a certain extent, you get what you pay for, although I’ve bought plenty of name-brand stuff that purely sucked. You have to respect this tool’s limitations.

But, once you consider that, there is plenty to like about this little tool at its price point. This is, after all, why I’m doing a writeup of this little guy. Over the past week, I’ve found myself reaching for it repeatedly, and on every occasion, it has worked well. So, with that in mind, let’s talk about what this tool can do.

Did I mention that the biggest draw for me with this tool was the pocket-knife-like large, one-handed opening stud and blade locking feature? Observe.

This is really nice- it gives true pocket-knife convenience to this multitool and has a locking blade, which is a big deal. The blade can be deployed in a second with a flick of the wrist, cutting open envelopes and bailing twine just fine. I think the blade is cheap stainless, but I could be wrong. I don’t really care. I don’t plan on using this thing to pry, and I probably won’t get in a knife fight with it against barbarian hordes, so whatever. Seriously. It cuts. This is what it should do. While I’m not a huge fan of serrations, they have their uses, and you can do a lot with a three-inch blade. After a trip to the whetstone, I’d imagine that this little knife could field-dress a deer just fine. I guess this could also be a defense tool for those bloody-minded readers out there. By the way, with some experimentation, you can orient the tool in the sheath so that when drawn, your thumb automatically rests on the opening stud.

As a pocket knife, I checked the box. With a little fiddling on the blade, the lock works, and so does the knife. But what about the rest? A major detraction was the lack of a pocket clip; I’d have to use the stupid sheath to carry this thing around. Well, this turned out to be a non-issue. Observe.

The relatively tough little sheath, a standard cheap multi-tool style, has a nifty little side compartment for the strip of Apex bits. I quickly found out that when worn, it was easy to access. It didn’t interfere with the by-feel resheathing of the tool at all. Also, the little strip of Apex bits is a force multiplier; it gives you tremendous options for all those annoying fasteners you come across in a house, on the job, or on a vehicle. I didn’t appreciate this at first, but I do now. This is a very intelligent feature. Observe.

See the square Phillips bit? While you can use this as a Phillips screwdriver, and the can opener has a slot-style screwdriver head, the real power is in the square shape of this screwdriver, which acts as a drive for the Apex socket. This shaft also locks- very important if you must press down on a stubborn fastener. I’ll show you how this works. See below.

Yes, that is a T-type Apex bit, which is not included in the strip of Apex bits. Something I think is really cool is that you can mix and match bits in the snug rubber stripper to suit your needs. In the multitool I now carry on my belt, I swapped a few bits around to reflect what I’m likely to come across here. After seeing this feature in action, my reservations about the lack of a pocket clip disappeared. Also, this little multitool isn’t terribly awkward on my belt. I see now why you need to wear the sheath; it doubles the possible uses for this tool. Also, the Apex socket itself can be used as a 1/4-inch drive socket- this is a standard size for many small fasteners. Observe.

Let’s discuss the all-important feature of this multitool and the reason I took a chance with it. The pliers. Do they work? In the ad, they looked awkward. How easy are they to deploy, and how do they fit into a very small package? Well, I found out. I used the pliers that same day, and I’ve used them a couple of times since. They are handy as all hell. Check it out.

You lift a tab and swing the handle in a wide arc to deploy the pliers. Like a magic trick, the completely concealed pliers swing into view as you do so. Another question I had was how much beef the pliers have. Would they be so skinny as to be unusable? I found out. It turned out that these are pretty good light-duty pliers; as a bonus, they are spring-loaded. Look below.

The pliers are a 3 in 1 design. They are needlenose with a semi-circular slip-joint style grasper, and they are wire snips at the base. A few caveats here. Note that I said “light-duty pliers.” I mean this. If you honk down on them really hard, they might fail. See the wire above? Pretty tough stuff. After I snipped this, I had to chew it a bit, and then when I went to swing them back into the case, I had to wiggle the pliers a bit. They seemed a little sprung, but the wiggle set things back into place. It could be that if you really gave these hell, they’ll break.

Once again, respect the tool’s limitations. Get another tool to loosen a rusty, frozen 9/16 nut. However, these are great if you need to pick something up in a bad spot, remove a splinter, loosen a small nut, or snip some 14 gauge wire. I’ll show you an example of a chore I did with these pliers; they were perfect for this light-duty task. Observe.

This was a battery monitor I added to the Roxor- its function is to tell me how much I’ve drained the battery while using it as an engine-switched-off work platform. For example, running or charging tools from the inverter, using the lights and radio, etc. You don’t want to be caught with a dead battery in the middle of nowhere, so it’s a nice feature. If you’re down a couple of green bars, let the engine run for a few minutes until you’re charged up, then switch it back off. BTW fairly soon, I’ll post a Roxor update article here.

The multi-tool tightened the nut on the rocker switch, snipped the wires I ran, and tightened the 1/4 self-tapping screws you see on my homemade bezel. Yeah, I ran the screws in with an impact gun, but for the final turns on the delicate plastic housing of the gauge, I used the multitool. It worked as advertised.

Overall, I’m very pleased with this thirteen-dollar purchase. I haven’t seen any other multitools with this exact configuration, which combines the handiness of a pocket knife with the function of the traditional, fold-out style Leatherman, for example. Also, the sheath isn’t so bad once you get used to it. It is somewhat heavy, so a trick you can use when removing your pants is to loop your belt through a pants loop and snug it. I learned this trick back in the day when I wore a holstered weapon at work. While this is nowhere near as heavy as a service pistol, it does have some weight and will fall from your belt.

Time will tell how well this little guy holds out with daily use; it’s an inexpensive knife, and those usually fall apart with time and use. To be fair, however, so do the expensive ones. I’ve broken or worn out Gerbers, Schrades, Kershaws, and Camilluses. With hard use and time, all tools fail. However, this is fantastic as a glovebox tool or an emergency kit. If you need one of these in a pinch, it is guaranteed to work on that one badly needed occasion.

Respecting its limitations and manufacture, this is a damn good value. I’m so impressed that I thought to share it with you.

The Poncho Hooch

If you haven’t noticed, I’m all over the place in this blog. Writing, vehicles, events, happenings, and from time to time, gear and fieldcraft.

Today, we will do a little gear stuff for those interested.

A write-up about the US infantryman’s friend, the poncho hooch, is long overdue. I thought about this when putting together an improved emergency kit for a vehicle; yes, you include car-specific stuff, but you also need to think about food, water, medical, and shelter in case of a really bad day. Looking at my mentality, I probably went a bit overboard. But that’s OK. It’s always better to be overprepared than the opposite.

This is when I remembered the poncho hooch, something I haven’t set up in over a decade. However, it is so simple you can’t forget how to set one up if you have done it just once. I thought I would share this with you.

The first ingredient you need is a good USGI or a similar poncho. This is, trust me, easier said than done. However, I found a very nice Amazon product; it is close to the trusted USGI design. I can only vouch for the OCP-upgrade pattern. The other styles the seller sells may be from other, possibly inferior, manufacturers. Of course, this design can also be adapted for small waterproof tarps. You’ll see.

The second thing you need is a 15-20 foot length of 550 paracord. This is widely available and has many possible uses. It should always be a part of any kit.

Finally, you need six stakes. Four will do in a pinch, but six is better.

That’s it. This is all you need for this style of shelter, which is much lighter, more compact, and more versatile than any conventional tent. The configuration I’ll show you is but one of many possible. Below, the ingredients.

See the three components. All of it stuffs into the poncho sack. Note: It’s a good idea to keep the stakes in a rugged plastic pouch. You don’t want to rip your poncho when stuffing them into the bag.

How compact is compact?

9.5 inches (24.1cm) is pretty darn compact. In addition, you don’t have to keep everything in a stuff sack. For example, in some units I was in, the SOP was to keep the poncho folded and secured by the aforementioned 550 cord over a weapons belt. You kept the stakes in your ruck. This is very compact. It is also a PITA to get off your belt every night. I prefer the stuff sack. It’s just easier.

By lightweight, how light do I mean? Check it out.

One pound and two ounces (510g) for the complete package. It doesn’t get lighter. Almost any tent you buy will be heavier, bulkier, and harder to set up. And, oh yes, it is more difficult to egress if there is a problem.

Of course, there are disadvantages to this setup. It’s not perfect. One thing is that there is no floor; an isolation mat is handy here, or at the bare minimum, a mylar blanket. Also, there is no bug screen, and creatures are free to crawl in with you. Here’s where a little field knowledge comes in. Choose your site carefully, and check for rocks, branches, etc. Heap up leaves for some cushioning, and ensure you take any flowing or standing water into account. You can’t do much about the beasts except to make sure you don’t have any food remaining where you sleep and exercise due caution when you get up. Bug spray is nice, too.

Camping is an experience thing. I’d suggest you try this out, and all of your other gear, before you need it. Just because. But, let’s get on to how to construct this.

It’s dead easy. Find the aforementioned nice patch of real estate, and remove the clutter that will screw up your sleep. If you’re being all crazy and tactical, disturb nothing and leave the smallest footprint possible. For most considerations, though, who cares? Make yourself at home. You’ll be sleeping there, and you want to make an already crappy situation as nice as you can.

You need two trees about ten feet apart (3M). Secure one end of the 550 cord to one tree, tie it around the other, and tighten it. The tighter, the better. This helps your shelter shed rain and is the central support. Make it the height about halfway between your knee and your hip.

Then, drape your poncho lengthwise along the 550 cord. The poncho hood should be in the approximate center, and the ends of the draped poncho should be about the same lengths they touch the ground.

Next, you stake one corner, ensuring you don’t pull your poncho off-center. Go to the opposite corner and stake it as well, drawing one end of your shelter tight. Then, go to the other end and do those corners, pulling the poncho tight along its length. Finally, do the stakes in the middle, which will complete the tightening of your shelter. You can cinch the hood shut, or simply drape it over the side. Some guys like to tie it upwards to further tighten the structure; there is no right or wrong way. Feel free to experiment. You just need it to keep you dry as you sleep, and making it tight helps with this. Also, a tight tent doesn’t flap in the wind, either.

The poncho hooch is now done. You can move in and rack out.

How long did this take me, out of practice, everything jammed into the bag, and not really hurrying from start to finish? Observe.

Pretty quick. And I know that if I did it three times in a row, I’d knock a couple of minutes off.

The GI poncho hooch. Time-tested and sure-fire.

Cheers!

Manual Labor

Guys, I am tired and sore.

One of the methods I use to heat this house is a wood furnace. This is reserved for the coldest days; running the woodstove on a mild day will run you out of the house. But, the frigid days are a thing around here. It can get to -4F or -20C. Sometimes these brutal temperatures stretch for weeks, so a wood supply is necessary. Yes, I could run the old oil stove. The oil furnace is great, but it’s expensive and not exactly eco-friendly. The wood stove isn’t either, but it’s better than oil if you think about it. This is because I don’t harvest live trees. I always take deadfall, which is plentiful in the forest. A dead tree will release its carbon whether it rots or via my woodstove.

Yesterday’s tree fell over in a storm onto a neighbor’s lawn. My neighbor is elderly, he can’t clear it himself. Some random guys said they’d handle it. They left behind the hard part and took the easy wood, the small branches, and the limbs. The trunk, which has literal tons of great firewood, will have to be “chunked out” or removed in sections.

It’s hard, punishing work. This is with a chainsaw and a log splitter; without these modern tools, there’s no way I could do this.

The wood is soaked, very green, and heavy as hell. It will have to season for a year, this will be next winter’s wood. It’s ridiculous. A regular-sized log probably weighs twenty pounds or so- it should weigh half that. Laughs. Not so much. Let’s just say I got my steps in yesterday, and used muscles that needed exercise. Today, I feel it, and the chore is nowhere near done. This will take a while.

The trunk is probably 48 inches (1.22m) at its widest- it was a big tree. My saw (a good Stihl), while no weenie Walmart thing, is outclassed by this brute. My saw has an 18″ bar. The trunk is 48.” Think about it. Chunks, it is.

I can only stand to do this for a few hours a day, and then I’m worn out. At this rate, it’ll take all week to get the job done. The reward, of course, is good dry wood next year. But boy is this middle-aged and hard-ridden frame tired. I don’t need yet another hernia operation, and I don’t need to screw up my back. Therefore, caution and pacing are a must.

Tough to do when the trunk sections probably weigh as much as an engine block. Phew. Nothing to do but play lumberjack and imitate the turtle- slow and steady wins the race. I should set a timer. Four hours max. When I was younger, I could do this sort of thing all day long. Well, those days are past. My biggest challenge is not to push too hard, to keep thinking I can do just a little bit more… Bad idea! When your body says, “Don’t do this,” you should listen.

So, it may take forever, but I’ll get it done. Holy cow, what a tree.

Need a workout? Cut some wood.