
This weekend, I attended my tribe’s powwow in Mendota, Minnesota. I discussed this at length on my paywall site. If you’re not signed in over there, maybe you want to check it out. The barrier to entry is low. But I digress.
During the activities, our tribal secretary suggested that I check out one of our vendors, a tribal member named Jeff Bardon. I did so. He runs a business called River Valley Trading Company, and he sells unique Native-related art and products. I bought some cool stuff from him, and during the course of arranging shipping, we talked a little. Somehow we got on the subject of violins, and he mentioned that he had a frustrating experience with his, a standard Amazon Cecilio MV-300 model.
Long-time readers know that I am very familiar with this exact model. In my older posts, you can find my review of those violins. The MV-300 forms the basis for the economy fiddles I sell at flea markets. The bodies are solid products, but their fitting is terrible. Bad bodies can’t be fixed, but fitting can.
I always have a few MV-300s sitting around here awaiting prep for sale. We made an agreement. He’d send me his to trade for one that I prepped. When his arrives, I’ll prep it for sale. Meanwhile, I whipped one of mine together, finished it yesterday, and shipped it. I thought I would tell my violin-interested readers about this process, it turned out pretty good.
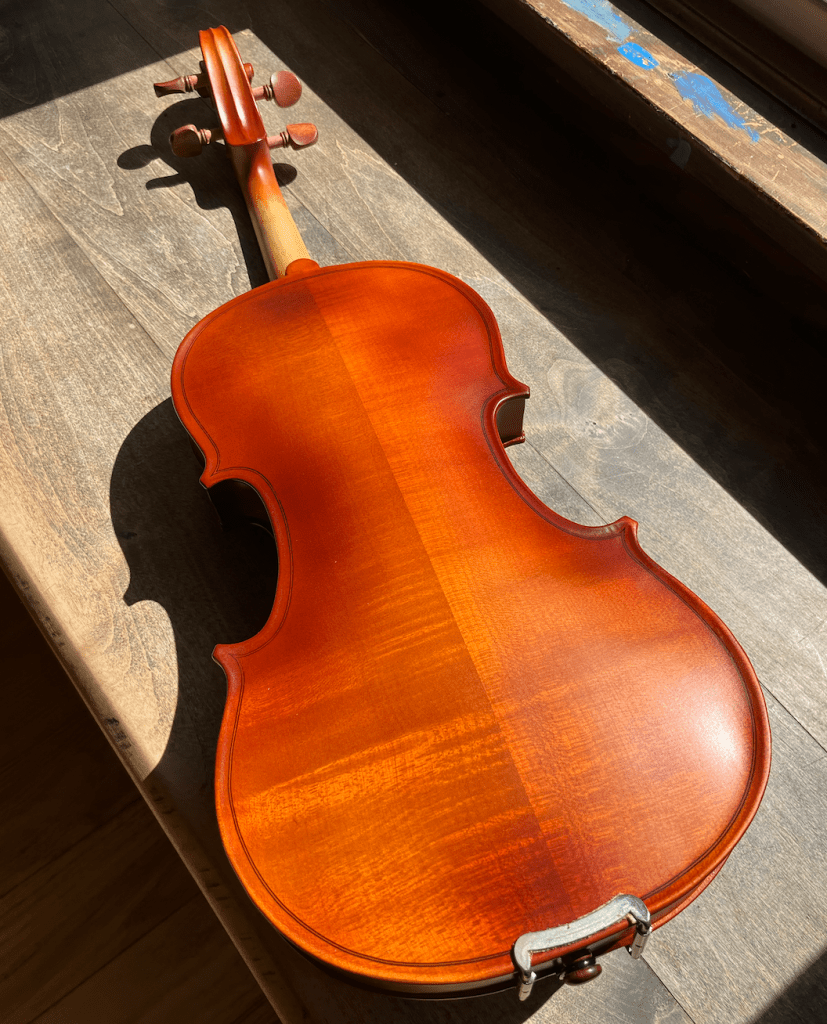
First, I gave him the pick of the litter: a body with decent wood character on the belly. It is by no means super fancy, but for an economy fiddle it’s nice! See below.
It was stripped, of course. I usually don’t reuse factory furniture; I save that stuff for donations or super-inexpensive repairs. Here’s what the start of the process looked like.
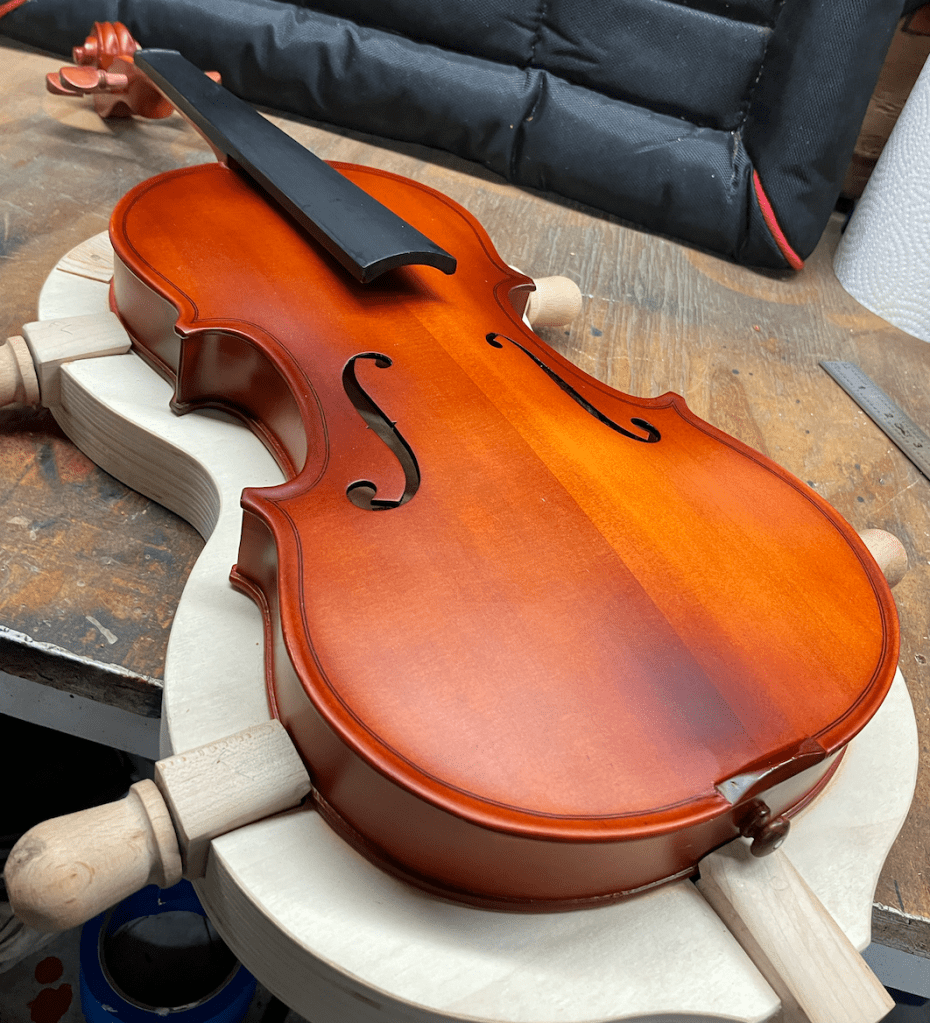
Ok, so this isn’t the very beginning. In this pic, I’ve already installed the new pegs and end pin. But minus those parts, this is how I start. The violin clamp simplifies all the maintenance you need to do on a fiddle. It holds it steady and level as you work on it.
The pegs determined the look I wanted for this violin. I happened to receive a shipment of mahogany pegs while I was in Minnesota, so I thought I’d try them out on his violin. They were good pegs, and certainly an upgrade over factory. I’ll show you the work on the box below.
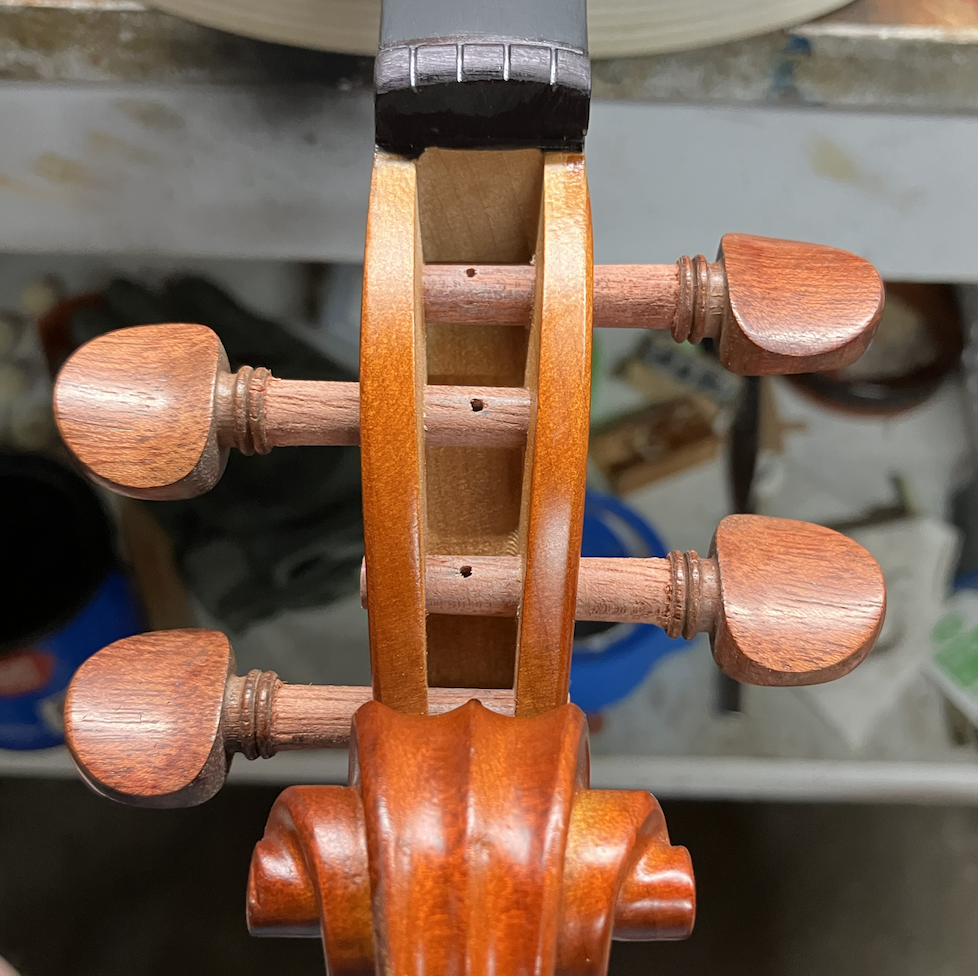
The factory nut was an abortion, as usual, so I shaped it and cut new grooves for proper spacing and string depth. I also penciled the grooves for lubrication. I shaved, fitted, trimmed, and drilled the pegs as well. These should last for years of normal use. Once the boxwork was done, I headed south, as usual.
I selected a good bridge and carved it. After I carved it, I fitted it to the plate. This is one of the most important steps of this process! A poorly fitted, low-quality bridge will adversely affect the instrument’s sound. Mind, a bridge DOES NOT have to be name-brand, but if you buy megapacks of generic bridges (I do for economy builds), you must carefully select the good ones. In this case, I thought I’d be fancy and give Jeff a nice Teller bridge.
Of course, while creating the bridge, I looked at the location of his sound post. To my surprise, the factory did OK, so I left the sound post alone. With the bridge completed, the next logical step was stringing the fiddle. It was time to make two decisions, one aesthetic and one practical.
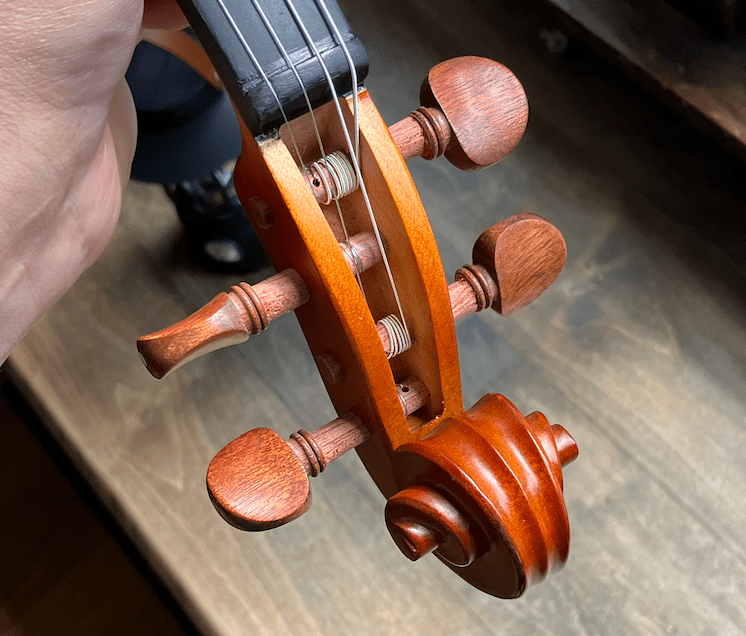
I installed mahogany pegs, so I was inclined to use earth-tone furniture instead of traditional black. Of course, the fingerboard was painted black, but without getting into the weeds there wasn’t much I could do about that. The fingerboard was 100% serviceable, but I could help the violin in other ways. At first glance, I thought to use an economy brown furniture set I’ve used on other projects, but the more I looked at this fiddle, the more I realized that that wasn’t the best choice. I rummaged through my parts drawer, and I had the good luck to find a nice red boxwood set that complemented the pegs. I held it up to the fiddle, and I liked it.
Then, I needed to decide which strings to use. Jeff is a budding fiddler, so high-end strings wouldn’t be a good choice. I immediately thought of Red Labels, my go-to strings for students. Also, these Cecilios like Tonicas, too. However, I had another idea for this violin. Low-cost, old-school strings called Black Diamonds have a bit of a cult following with the bluegrass crowd, and I just happened to have a set lying around. I decided to use those.
Decisions made, it was time to string the instrument. See below.

This was turning out pretty good, I thought. After winding the strings, I started to tension them per SOP, slowly but surely, while watching the bridge. As expected, the Black Diamonds were “hard” without much stretch. It was time to play Jeff’s fiddle. First a few detail pics, though.
The end pin detail, with the tailpiece and chinrest I picked. I also added some fine adjusters, good Wittners, because this is a fiddle, not a concert violin. Of course, I prepped the adjusters with a tad of bearing grease, and prepped Jeff’s bows, too.

This is the box, wound and ready.
I think the red theme really suits this violin. While this is, and will remain, a student violin, it’s important that the player likes how it looks. I ran the new look across Jeff via text, and he seemed pleased. This was good enough for me. It was time to play, the moment of truth. How did it sound?
While hardly high end in terms of resonance and tone, it was journeyman good. Perfect, I think, for a student! The Black Diamonds, while inexpensive, helped with that old-time sound, and they BEAT THE CRAP out of factory strings! ALWAYS pitch those in the trash, I’m not sure why they include them, honestly. They’re terrible!
While I enjoyed working on it, it was time to re-home Jeff’s fiddle. With a final check to make sure I included everything he needs to play, I cased it and prepared it to ship. Here was my final view of Jeff’s fiddle.

I boxed it and went to the post office.
Hopefully, this will get Jeff on the road to becoming a fiddler. It’s a solid learning platform. The MV-300, once properly tweaked, is a great place to start.
