Long-time readers will know that I have an odd hobby: I work on violins. I’ve done almost everything to them, except a sound post crack repair, which is very difficult. I’ve had old violins in many pieces on my bench; to date, I haven’t destroyed one. There is a dark art to repairing them, which I enjoy. I’d like to think that I’m improving with time. Perhaps.
An outgrowth of these repairs is a minor passion for selecting cheap instruments on Amazon and seeing what I can do to improve them. One model that I’m very familiar with is the Cecilio MV300; it’s cheap, and the fundamentals are solid. I’ve also tried others. Some were good, some were worthy only of donations to local schools. You can make many improvements to help an inexpensive violin, but some things are a no-go.
I’m referring to paint, as opposed to varnish. I’m also talking about plywood plates: those are terrible. In addition, false beautifications such as painted purfling (the wood inlay around the edge), false character added to the wood (think airbrushed tiger striping on the belly and ribs), and anything that detracts from the natural beauty of the honest wood.
I’d rather plain-Jane but honest spruce and maple. You must have a spruce top plate and a maple body. It’s not just aesthetic; it’s about the violin’s performance. There are good reasons why violin makers have used those woods since the late Middle Ages! I say this to establish that ALL cheap violins I buy on Amazon have these basic materials and construction. They also must have full-length bass bars with an OK profile. You can see them through the left F-hole. It’s a performance thing. You can’t compromise here.
I’m astonished that you can find violins for less than 100 USD with everything I require. In addition, these violins come with a case, a bow, usually a polishing cloth with rosin, and they throw in a cheap tuner, too.
But here’s a cautionary note: these violins are seldom ready to play.
What do I mean? They come with everything you need, right? They do. However, the fitting and strings are terrible in most cases; I’ve seen exceptions, but as a rule, this is a fact.
If you don’t want to mess around with the fitting, spend some money and get this model or this one. These violins are ready to play out of the box. These are made by the same company as the violin I’m reviewing today, but they’re MUCH HIGHER GRADE. I know- I own one of each, and they are easily equal in quality to 1800 dollar violins that I’ve purchased from a well-known US-based violin specialty store. These are Cadillac, traditionally manufactured instruments! The catch is that they come all the way from China, and you may wait a while to receive one. However, it’s worth it, I assure you. While you must be judicious, Yinfente is a legit manufacturer, and their products, while not well known, can be great if you shop carefully.
But I’m not talking about those violins today. I’m talking about the “Yinfente 4/4 Acoustic Violin Kit,” which, after checking the well-known online violin retailer, I suspect is the exact same model as one of their low-end fiddles. Of course, the well-known retailer’s offering has a nicer case and is probably warmed over by their in-house luthier. Still, upon close examination, I believe it is the same base instrument for three hundred dollars more.
But I digress.
I had experience with Yinfente and came away impressed, so I decided to try their lowest grade offering for 100 USD. As is frequently the case with cheap Amazon fiddles, you get it all. A bow, a tuner, a case, rosin, etc. How can you go wrong? Well, you can if you order from the wrong company or the wrong model—many terrible instruments are available at this price point. Caveat Emptor, and all of that. But the models I’ve linked to above are OK with varying degrees of elbow grease. The Cecilio lots, the high-end Yinfentes almost none. How would this low-end Yinfente be, I wondered? I ordered it, and it came in faster than I expected—one must have been hanging around in a Stateside warehouse. This is not always the case; I’ve waited up to five weeks.
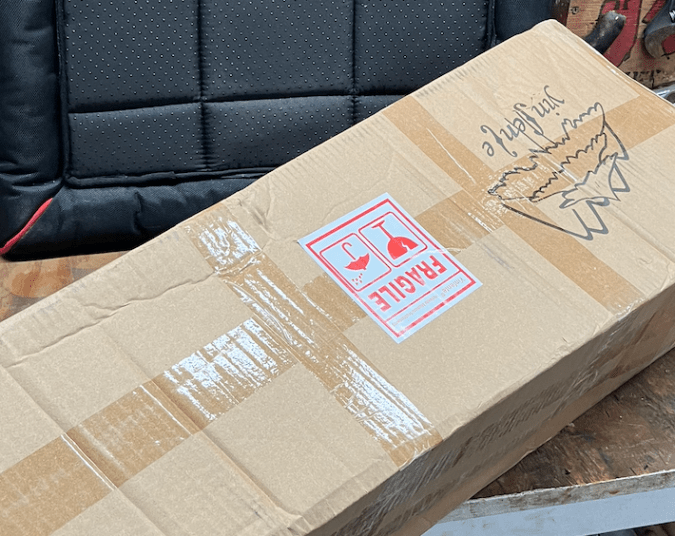
The big box arrived. This is always a moment with a tingle of excitement for me. What will I get? I busted open the box and opened the case. Here’s what I saw.

At first glance, it was a pedestrian instrument. I noted its genuine ebony furniture; violins at this price point usually have painted wood. The top was spruce. Before I flipped it over to check the belly, I looked at the bow, which was surprisingly nice. Actually, I shouldn’t have been surprised; just about all of the bows I’ve received from this manufacturer have been good. At this price point, you usually receive what I lovingly call AK-47 bows; they can charitably be called serviceable. Yes, the fiddle came with rosin, a tuner, extra strings, etc. They said it was a complete setup, it was. I didn’t like the bridge however, and I noticed the grooves on the nut would have to be deepened. However, the pattern was good, so that was a plus. It was time to flip it over and look at the belly.
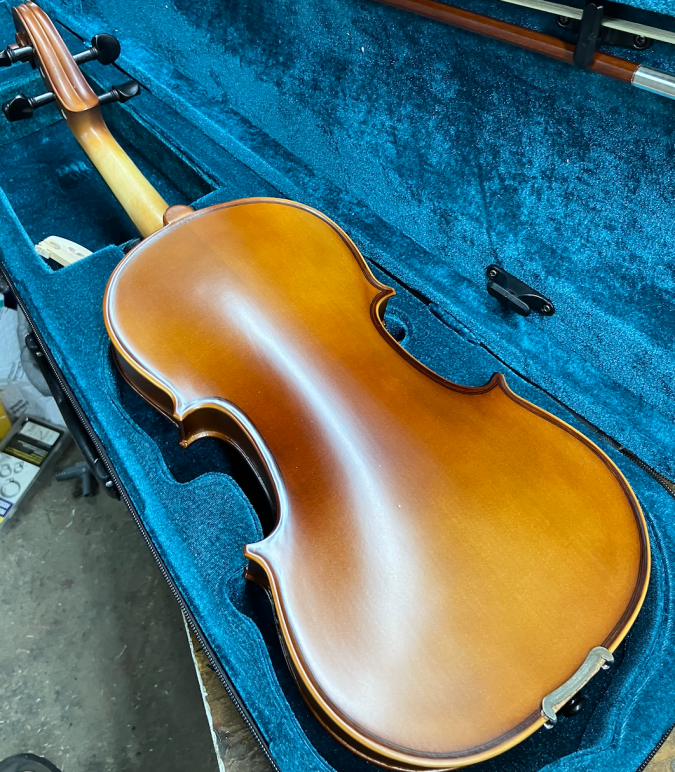
I have to say I was disappointed; I’d hoped for at least a little figure or flaming. Sometimes even the cheap Cecilios have that; this one just looked ugly and brown. However, it was maple, and that is what matters. While I was at it, I checked the position of the sound post and was annoyed again. The stupid thing was in the arch; it was badly misplaced. This, of course, meant more work for me. A sound post must be placed just aft of the treble side of the bridge foot, preferably a bit toward the F-hole. This one was waaaaaay off! I shook my head, put away the case, and started the process. I knew what I needed to do.
And by the way, the strings were the standard Chinese factory junk. Chinese strings can be good—higher grades exist. These were not. I’ve learned the hard way to dump them in the trash immediately. I’m not sure why they even bother- it’s like playing on a cattle fence, and I’m hardly an elitist.
It was time to get out The Clamp- the indispensable tool for violin maintenance. Observe.

I stripped the fiddle down; you must remove the chinrest to put it into the clamp. Also, if you’re doing a bridge, you must remove the strings and tailpiece. Note, I removed the end pin as well; you have to if you reposition the sound post (GRRRR). You need to look through the end pin hole to see if you’ve set it straight, which is easier said than done. What should have been an easy job was complicated by carelessness; the sound post dude must have been in a rush to go on tea break or something. The piece of tape on the top plate is a visual aid I use; it indicates where the sound post SHOULD go, which was not how it arrived. Obviously.
I did the part I hate worst first, the sound post. See below.

These are the required tools. The weird cloverleaf thing moves the post around once it’s jammed in. It’s a friction fit. The clamp thing is the sound post retriever. You need it when you remove the post by knocking it over, and you need it some more when you inevitably mess up. The machinist’s scribe jams into the post; you need to stick it into the post when you install it. And all of this needs to be done through the treble side F hole. Does it sound like a pain? It is. And then, when you think it’s great, you look through the end pin hole and see…that it’s crooked AF and you need to adjust it, again.
Sometimes, it’s easy. Sometimes, it’s not. But I got it done.
It was time to move to the bridge. I selected a bridge from my handy stack of bridges, which I scored for fifty cents a piece. I fished through and found one with good wood grain (the long grains must go toward the player), then I gave it the bounce test to see how it sounded. This sounds stupid, but it’s not. You want dense wood in a bridge. Dense wood has a different sound from lighter, looser grain.
Bridges are an art form; I’m still unsatisfied with my bridges, but I’m improving. First, you must fit the bridge to the top plate. I use yet another special tool for this, which requires practice.
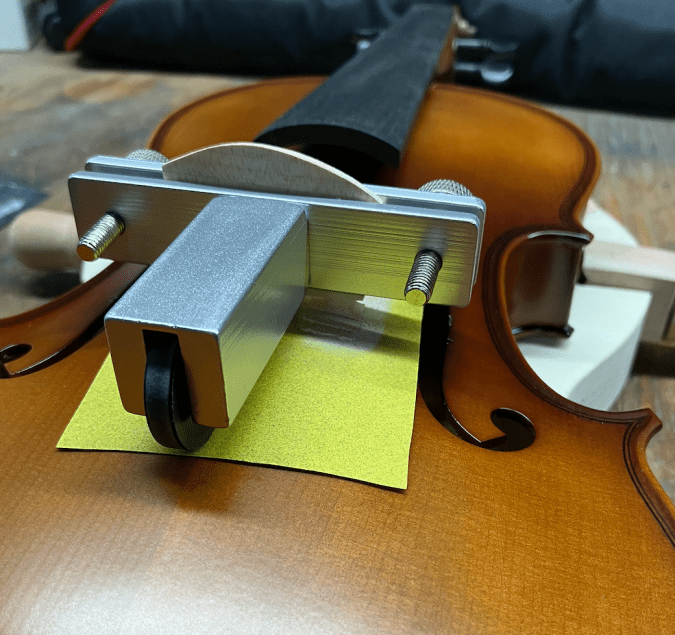
Ideally, the feet of the bridge should be about one millimeter thick and perfectly formed to the lid. You do that by clamping the bridge in this tool and then you move it back and forth upon a piece of 220 sandpaper until it’s close. Then, you switch to 600, and finish it off with 1000. Note: when done, the bridge must be at a ninety degree angle to the top plate, or you’re going to have trouble when you tune. In this case, all was well, and I moved on to carving and profiling.
Carving can be intricate; the point is both beauty and mass. The less mass, the better the resonance. I could go into detail, but I won’t. Suffice it to say that you have to work on the “ankles” of the bridge, and enlarge both the “hearts” and the “kidneys” of the bridge, and then make a few cuts with a razor knife. And of course, you must not weaken the bridge. Practice makes perfect, I guess.

I could point out a few less-than-perfect spots on this bridge, but I won’t bother. This is after I strung the instrument; it’s good enough, I suppose. Next time, it will be better, but it has improved much over what I received.
I did a bunch of other stuff, too. I wasn’t a fan of the rough texture of the fingerboard, so I sanded it lightly with 600 grit. Lightly! Fingerboards have a “hollow” of .7mm, you do not want to screw that up. A flat fingerboard isn’t good, it’s a resonance issue. After smoothing out the tooling marks, I added a very light coat of olive oil to the fingerboard only—so light, that it is dry to the touch. Then, I carefully deepened the string grooves for playablity, and penciled the grooves for lubrication.
The tailpiece was fine. It was a plastic student piece. If it were one of the cast aluminum ones, you’d be better off throwing it away; they are junk and will break every time. The saddle and endpin were good, too. I was impressed by the work on the peg box—the good-quality pegs were well-fitted, which is rarely the case at this price point. All I did was to add some peg soap and they were ready to string. Observe.
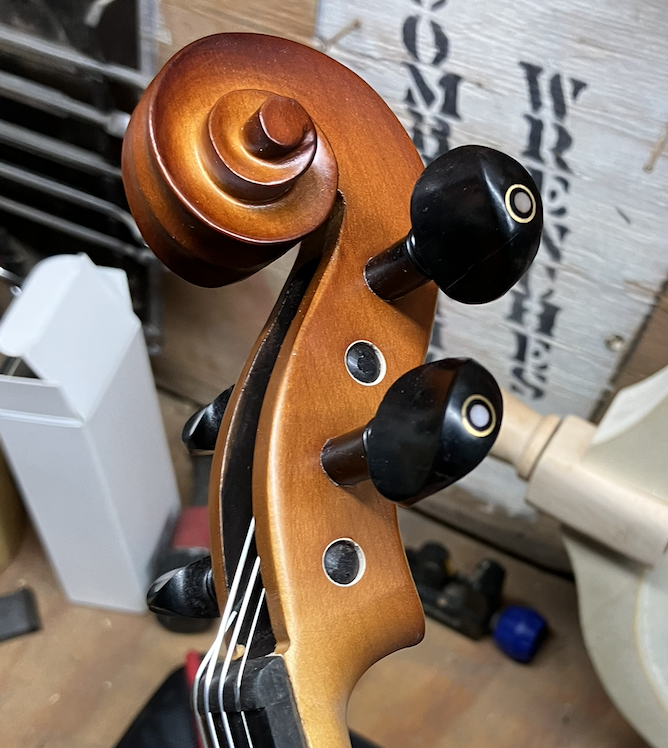
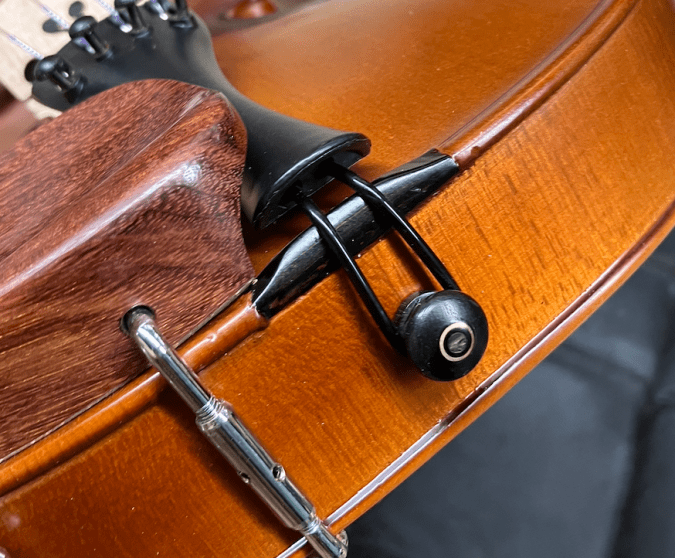
This is pretty nice for a hundred-dollar fiddle box! I also liked the end pin. I made an aesthetic choice to replace the perfectly good ebony chinrest with a rosewood unit. I think this adds a splash of color, and you may agree. See below.
I chose Fiddlerman strings because they’re what I have at the moment. These are good strings. While I wouldn’t go with expensive strings on this instrument (like Dominants), you can’t go wrong with a string upgrade here. Don’t spend more than about thirty bucks, however. Pirastros or Ascentes would be great too.
After prepping the tailpiece screws with a very light coat of bearing grease, I strung the instrument, taking care not to pop the new bridge (as you tighten the strings, the bridge will begin to lean forward). As usual, I took it easy and let the strings stretch as I went. After a few hours, it held tune and was ready for pics and a little play.
Of course, when the instrument was naked, I polished it with Supertonic, my personal fav.
This fiddle surprised me a bit; I think it dressed up fairly well. See the belly in sunlight, polished.
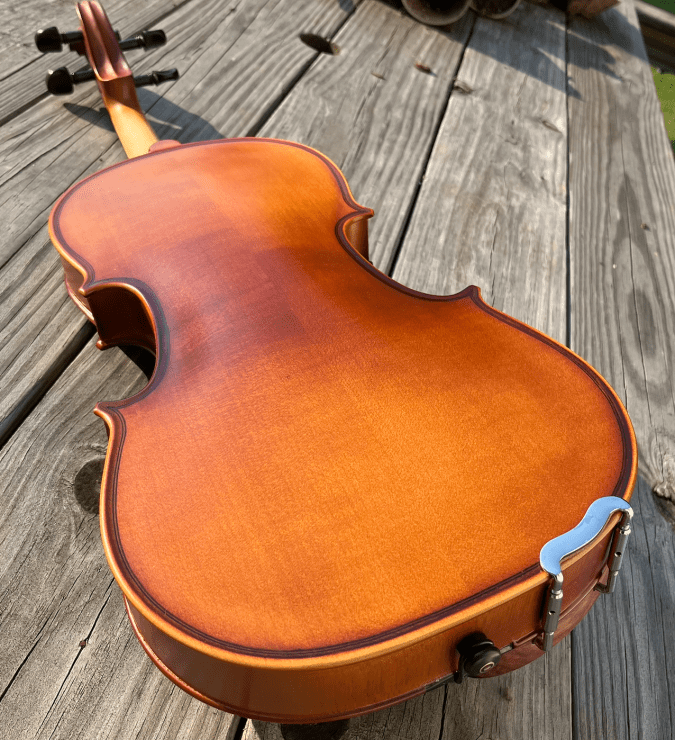
Huh. There is some faint figure to the wood. Amazing what different lighting and polish will do!
But the looks aren’t what makes a fiddle; it’s how it plays.
This fiddle plays pretty well; I took it for a stroll this morning. In addition, because of my few mods, it handles and feels good, too. Playability is important! A fiddle that doesn’t feel right doesn’t play well, either. A bunch of little stuff adds up, trust me.
Here is the final product, a decent little hundred-dollar fiddle.

Not bad, I say. And it was fun!
Peace.
