If you haven’t noticed, I’m all over the place in this blog. Writing, vehicles, events, happenings, and from time to time, gear and fieldcraft.
Today, we will do a little gear stuff for those interested.
A write-up about the US infantryman’s friend, the poncho hooch, is long overdue. I thought about this when putting together an improved emergency kit for a vehicle; yes, you include car-specific stuff, but you also need to think about food, water, medical, and shelter in case of a really bad day. Looking at my mentality, I probably went a bit overboard. But that’s OK. It’s always better to be overprepared than the opposite.
This is when I remembered the poncho hooch, something I haven’t set up in over a decade. However, it is so simple you can’t forget how to set one up if you have done it just once. I thought I would share this with you.
The first ingredient you need is a good USGI or a similar poncho. This is, trust me, easier said than done. However, I found a very nice Amazon product; it is close to the trusted USGI design. I can only vouch for the OCP-upgrade pattern. The other styles the seller sells may be from other, possibly inferior, manufacturers. Of course, this design can also be adapted for small waterproof tarps. You’ll see.
The second thing you need is a 15-20 foot length of 550 paracord. This is widely available and has many possible uses. It should always be a part of any kit.
Finally, you need six stakes. Four will do in a pinch, but six is better.
That’s it. This is all you need for this style of shelter, which is much lighter, more compact, and more versatile than any conventional tent. The configuration I’ll show you is but one of many possible. Below, the ingredients.
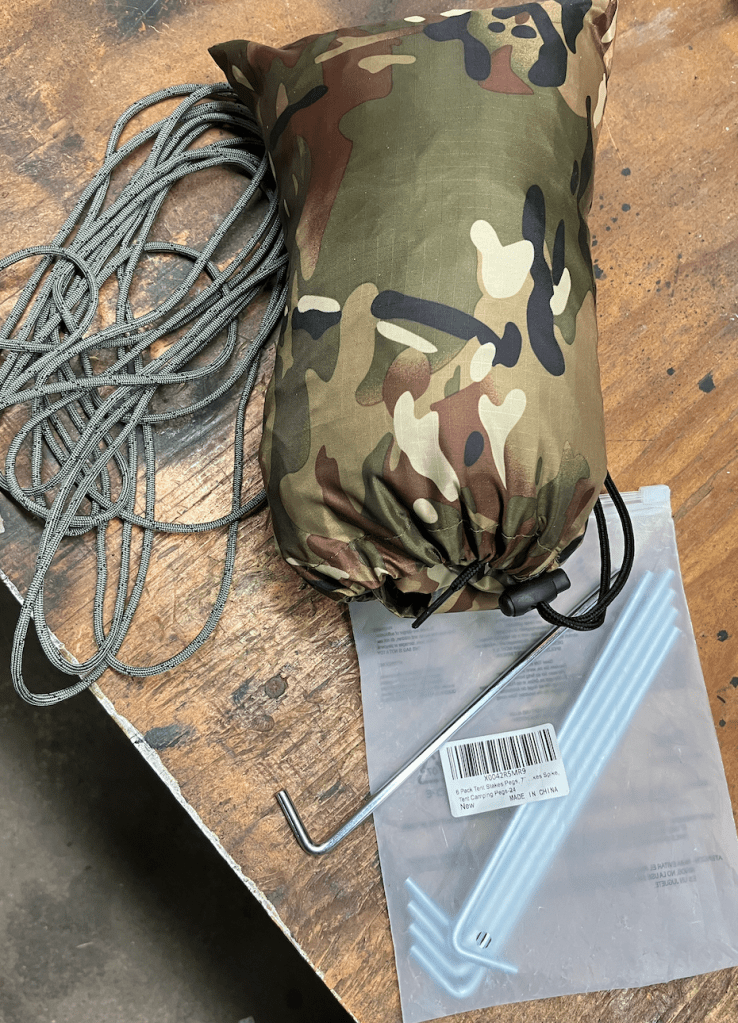
See the three components. All of it stuffs into the poncho sack. Note: It’s a good idea to keep the stakes in a rugged plastic pouch. You don’t want to rip your poncho when stuffing them into the bag.
How compact is compact?
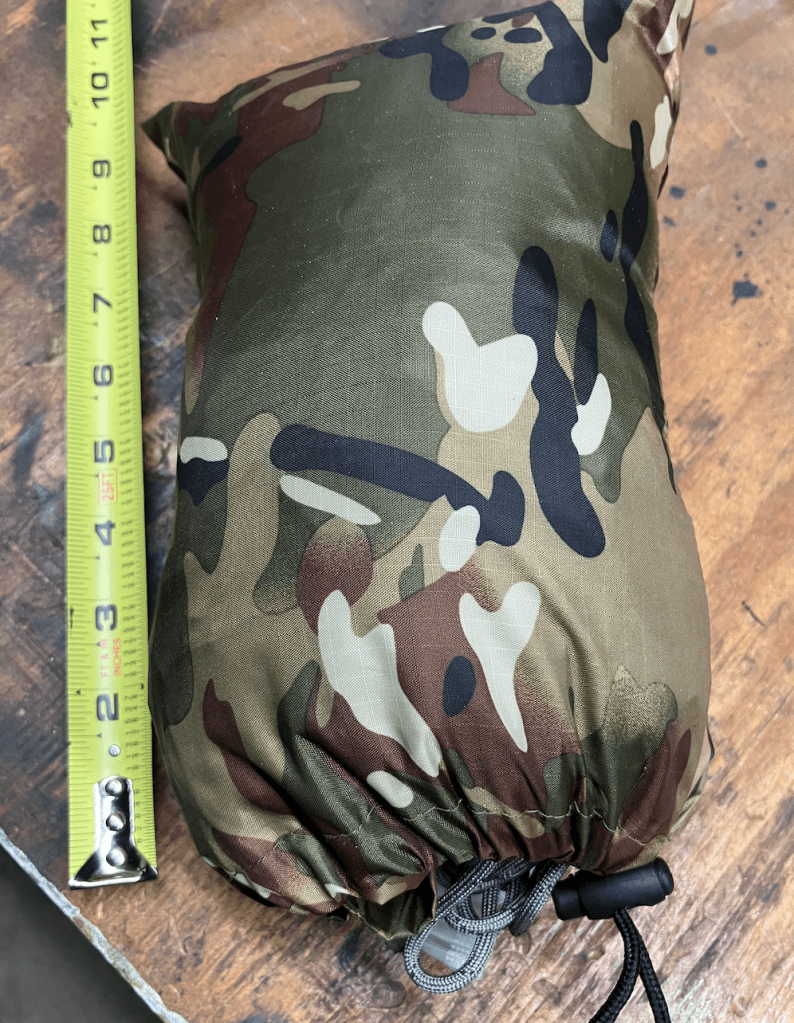
9.5 inches (24.1cm) is pretty darn compact. In addition, you don’t have to keep everything in a stuff sack. For example, in some units I was in, the SOP was to keep the poncho folded and secured by the aforementioned 550 cord over a weapons belt. You kept the stakes in your ruck. This is very compact. It is also a PITA to get off your belt every night. I prefer the stuff sack. It’s just easier.
By lightweight, how light do I mean? Check it out.
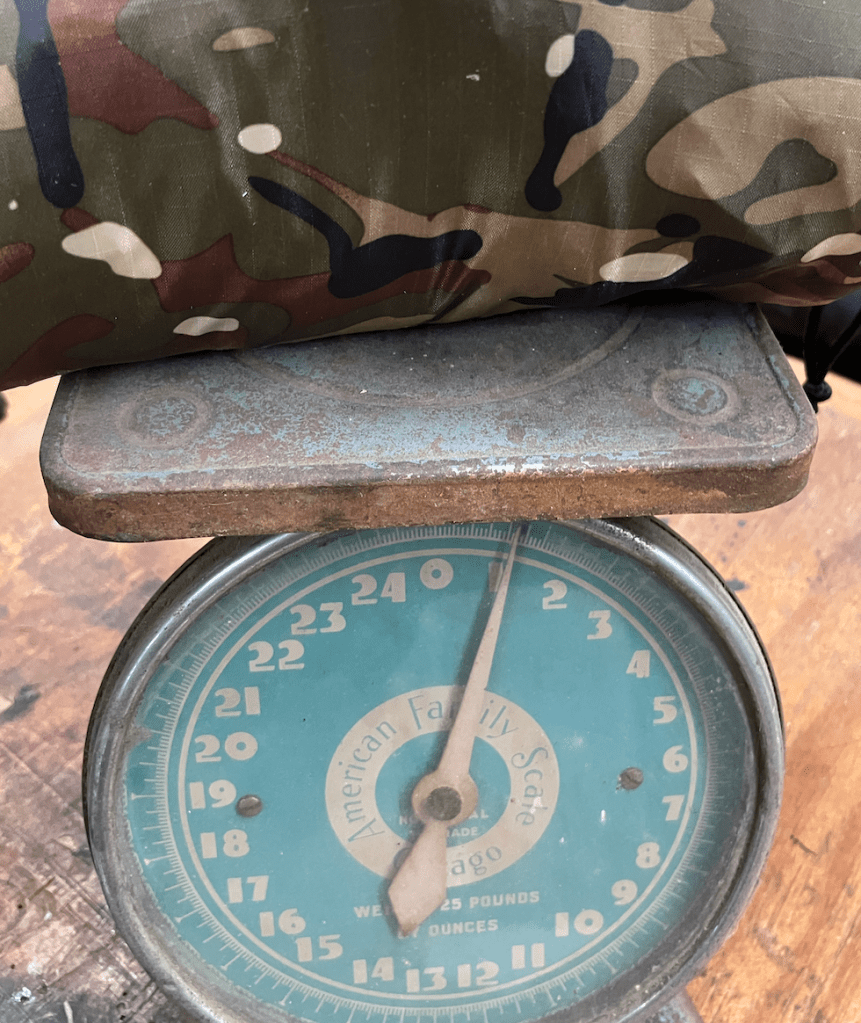
One pound and two ounces (510g) for the complete package. It doesn’t get lighter. Almost any tent you buy will be heavier, bulkier, and harder to set up. And, oh yes, it is more difficult to egress if there is a problem.
Of course, there are disadvantages to this setup. It’s not perfect. One thing is that there is no floor; an isolation mat is handy here, or at the bare minimum, a mylar blanket. Also, there is no bug screen, and creatures are free to crawl in with you. Here’s where a little field knowledge comes in. Choose your site carefully, and check for rocks, branches, etc. Heap up leaves for some cushioning, and ensure you take any flowing or standing water into account. You can’t do much about the beasts except to make sure you don’t have any food remaining where you sleep and exercise due caution when you get up. Bug spray is nice, too.
Camping is an experience thing. I’d suggest you try this out, and all of your other gear, before you need it. Just because. But, let’s get on to how to construct this.
It’s dead easy. Find the aforementioned nice patch of real estate, and remove the clutter that will screw up your sleep. If you’re being all crazy and tactical, disturb nothing and leave the smallest footprint possible. For most considerations, though, who cares? Make yourself at home. You’ll be sleeping there, and you want to make an already crappy situation as nice as you can.
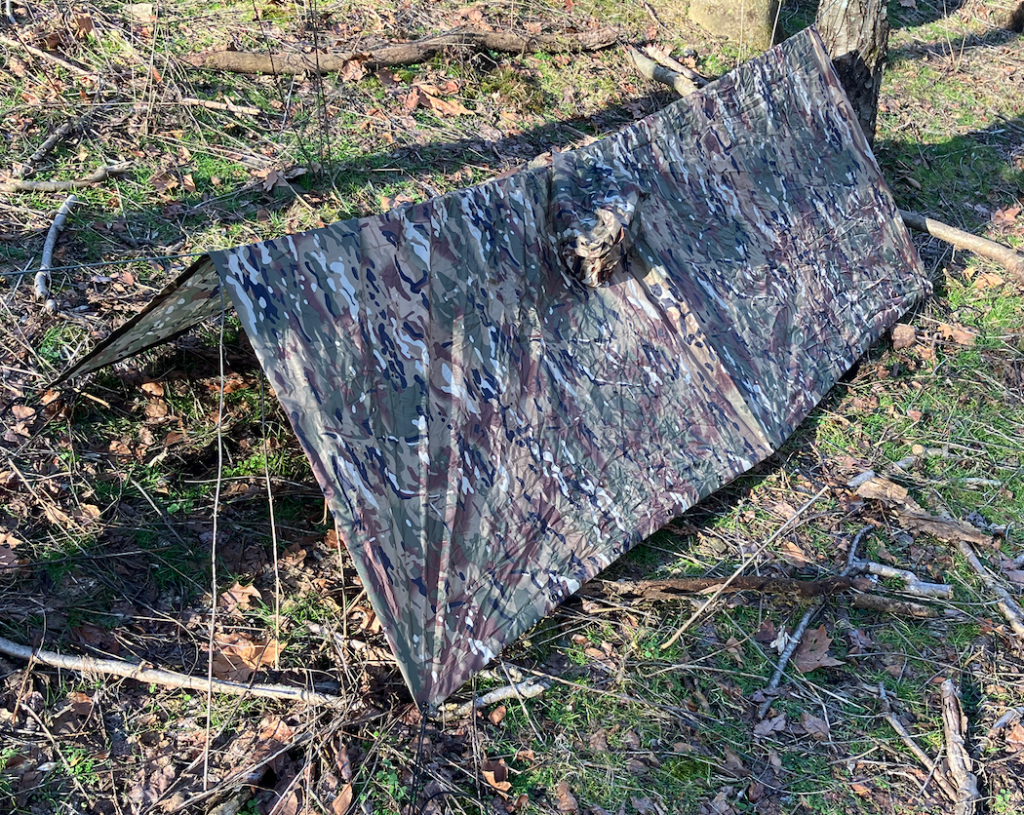
You need two trees about ten feet apart (3M). Secure one end of the 550 cord to one tree, tie it around the other, and tighten it. The tighter, the better. This helps your shelter shed rain and is the central support. Make it the height about halfway between your knee and your hip.
Then, drape your poncho lengthwise along the 550 cord. The poncho hood should be in the approximate center, and the ends of the draped poncho should be about the same lengths they touch the ground.
Next, you stake one corner, ensuring you don’t pull your poncho off-center. Go to the opposite corner and stake it as well, drawing one end of your shelter tight. Then, go to the other end and do those corners, pulling the poncho tight along its length. Finally, do the stakes in the middle, which will complete the tightening of your shelter. You can cinch the hood shut, or simply drape it over the side. Some guys like to tie it upwards to further tighten the structure; there is no right or wrong way. Feel free to experiment. You just need it to keep you dry as you sleep, and making it tight helps with this. Also, a tight tent doesn’t flap in the wind, either.
The poncho hooch is now done. You can move in and rack out.
How long did this take me, out of practice, everything jammed into the bag, and not really hurrying from start to finish? Observe.

Pretty quick. And I know that if I did it three times in a row, I’d knock a couple of minutes off.
The GI poncho hooch. Time-tested and sure-fire.
Cheers!

Not too dissimilar to the Aussie Hutchie, although ours don’t double as a poncho/raincoat, and are slightly larger with press studs to join to another if so desired. Experiences may vary, but by and large they aren’t a bad tent!
LikeLike
Yeah, I figure the hooch is as old as soldiering, really, in some form. Even if it was some ratty animal skin or something back in the day. Personally, I’ll take the USGI poncho. BTW, you can attach these together, too, with the press studs you mention. There are a zillion combos possible. I just did the simplest one.
LikeLike